The design of a form is a multi-step process, from creating the basic layout, setting the right properties, rules and translations, to finishing touches such as defining languages and creating a specific style.
An form is created by executing the following steps:
1. step1
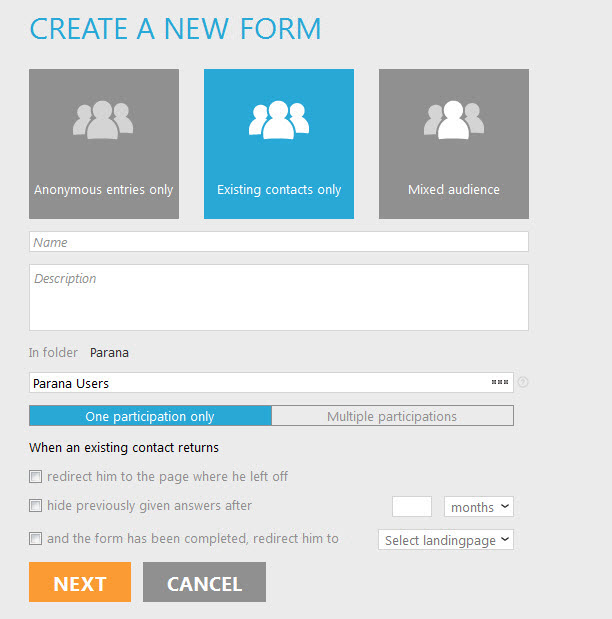
1. Create the form by clicking the + tab next to the 'Home' tab. A page is displayed where a name and description must be provided. The folder in which the form is created corresponds to the current selected folder in the tree view on the left.

A choice must be made on the type of audience for the form:
-
Anonymous entries only: form contacts which aren’t related to an audience list and are therefore not known in the application
Example:
When publishing an online form directly on a website, any contact clicking the form hyperlink can fill out the survey This means that no information about the contact is known in the Selligent Database.
This implies that a person can submit the form more than once, as it’s impossible to identify the user doing the action. So, the “Form participation for Existing Users” panel will be disabled.
- Existing contacts only: form contacts which are included in an audience list. In this case an audience list needs to be selected and additional options appear.
For more information on these options, check out the topic 'Form properties/Site audience'.
Example:
Inviting hotel clients contained in an audience list to respond to a customer satisfaction form.
Site customers are known in the environment because they are included in an audience list, so their answers will be related to the audience list record based on the user Id field (matching keys: ID on USERID).
- Mixed audience: both known and unknown contacts.
If you are unsure what to select, select 'Mixed. Since an audience list is mandatory in a journey, even if only anonymous contacts can fill out the form, Selecting mixed and selecting the audience list in Form is usually the best option.
1. Step2
Press the 'Next' button. A number of standard form properties are defined on this page:
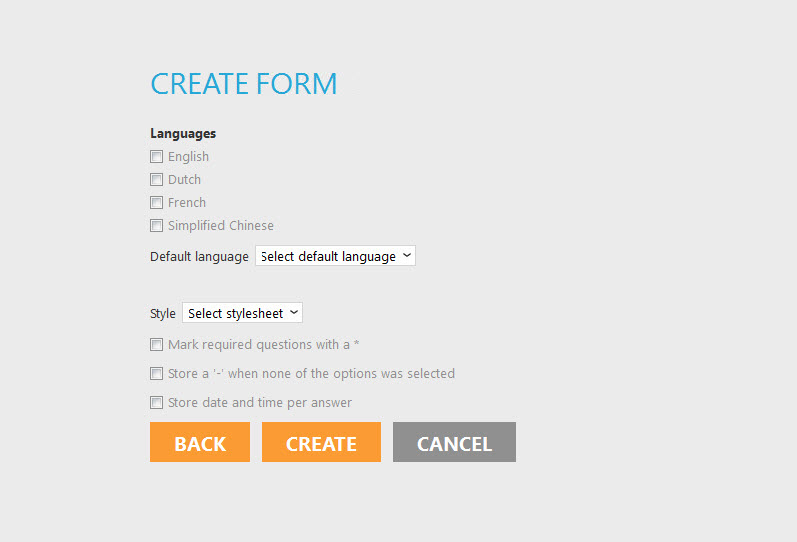
Set the different languages and select the default language for the form. Translations have to be created for the selected languages.
Set the style sheet to apply to the form. See 'Styles' for information on how to create a style for the survey.
NOTE: make sure when you select the responsive design style, that the option 'Responsive' is set in the style properties.
Select the option 'Mark required questions with *' if you want mandatory questions to be more visible to participants
Select the option'Store a “-”[…]'' if you want to be able to make the difference between contacts who have viewed a question and didn’t answer to it and contacts who didn’t see the question It is possible to hide certain questions with rules. of course the contact cannot answer hidden questions. This will result in empty values in the form list. If you select 'Store a dash (-) when none of the options were selected', you can make a distinction between questions the contact did not see (empty value) and the ones they did see but did not answer (-). Contacts who didn’t answer will get a “-“ as answer in the field value for this question. People who didn’t see the question will get a “blank value”.
Select the option'Store date and time per question'to storedate and time when a defined question has been answered. The date and time will be stored in a separate table called 'SURVEY_XXX_DT' with XXX being the number of the survey.
1. step3
Press 'Create' to save the form.
1. step4
The properties of the form can be reviewed and changed. In the properties additional numbering, input parameters and output events can be defined.
Following steps are:
Add pages to the form by using the corresponding button 'Add page' in the toolbar. Note that pages can be ordered by dragging and dropping them in the tree view of pages.
Define the Page properties. Page actions can also be defined if needed. Page actions are:
- additional validation per page
- Identifying contacts based on his responses (e.g. filled out email address)
- Skipping pages using 'Jump'
- Executing Stored Procedures or web service calls
Create questions by adding components to the form. Components are dragged and dropped from the Components list onto the page. Each page consist of a header, page and footer. The components (i.e. form elements) you add to the header and footer will appear on every page. The components you add to the page part will appear only on this page. Usually the survey title and progress bar are added to the 'Head' part. The navigation (back/next buttons or page indicators) are added to the 'Footer' part. They will appear on every page and only need to be added once. Page specific elements, like questions, are added to the 'Page' part.

When a component is selected, the properties of the component are displayed in the lower section of the main window and can be edited. A question is defined and possible answers set.
Create and update the database regularly so the form fields are created which store the answers to the questions you add to the pages.. This data can then be used to define rules or display answers elsewhere in the form or to steer journeys, create segments, etc.
Create rules if required. With rules, pages and components can be shown or hidden based on previous given answers.
Translate the form if it must be available in multiple languages
Publish the form to make it available
Related topics:
Apply styles to the form
Exporting and importing form by means of Packages
